

How To Install Apache Tomcat On Windows 8 64 Bit
This tutorial will teach you how to install and set up an Apache Tomcat server on a Windows system. Earlier getting started with this tutorial, ensure you lot have authoritative rights to modify arrangement settings.
What is Tomcat?
Apache Tomcat, or simply Tomcat, is a web server and servlet container used to serve applications written in the Java programming linguistic communication. Tomcat is free and open-source as an application of the Java Servlet and JavaServer Pages technologies.
Apache Tomcat is maintained and updated past the Apache Software Foundation. As of writing this tutorial, the latest version of the Tomcat server is version x.
Note: If you want to run applications written in Java version viii and higher, ensure you install at least version 9 of Apache Tomcat.
Requirements
Before installing Apache Tomcat on Windows, we need to ensure we have the Java Development Kit (JDK) or Java Runtime Environment (JRE) installed.
In this article, nosotros shall use the Amazon Corretto parcel to install JDK on Windows.
Amazon Corretto is a free, open-source, multiplatform OpenJDK implementation. It comes with security and performance enhancements for both development and production utilise.
Launch your browser and navigate to the Corretto download page.
https://aws.amazon.com/corretto/
Depending on the version of Apache Tomcat you wish to install, select your Corretto version correctly.
Use the image beneath to make up one's mind your required Coffee Version.

Since nosotros are installing the latest version of Tomcat that supports Java 11 and college, we demand to choose Corretto eleven or 16.
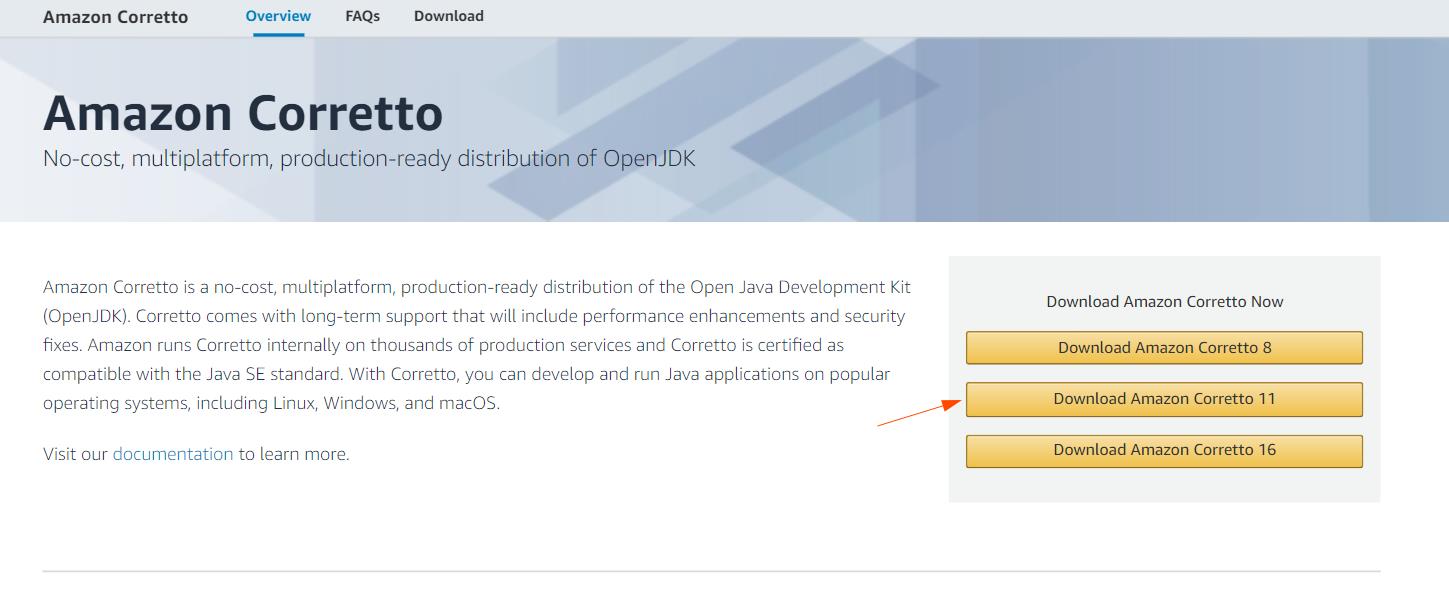
Select "Download Amazon Corretto 11" to download the Corretto version 11.
Once on the download folio, select the MSI installer version for your system.
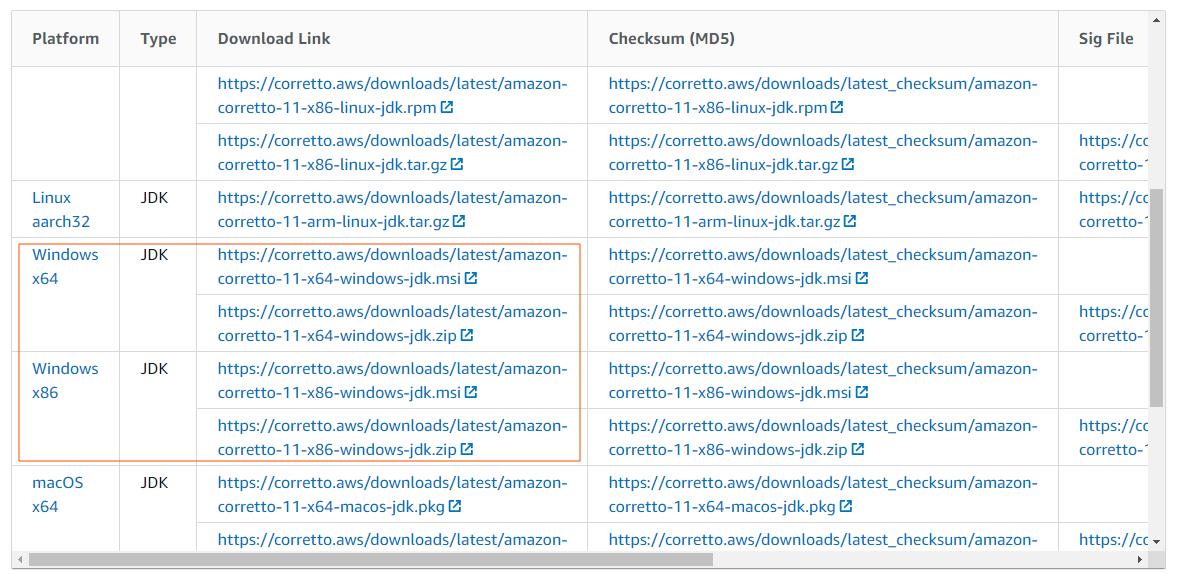
Upon completion, launch the installer to brainstorm the JDK installation process.

Finally, select Corretto and Setup Environment to install and click Next.

Once the installation procedure completes, launch the command prompt and enter the command below:
The above control should print information about the installed Java version. Here is an instance output:
openjdk 11.0.12 2021 -07- 20 LTS
OpenJDK Runtime Environment Corretto-11.0.12.7.1 (build eleven.0.12+ 7 -LTS)
OpenJDK 64 -Bit Server VM Corretto-eleven.0.12.7.1 (build eleven.0.12+ 7 -LTS, mixed mode)
Y'all have successfully installed Java JDK on your Windows organisation.
Installing Apache Tomcat 10
Now that we accept the requirements met, nosotros can begin installing the Tomcat server. In this article, we shall use the installer package.
Step ane
Launch your browser and navigate to the Tomcat download page.
http://tomcat.apache.org/
On the left carte, select the desired version. (We volition be using version 10).
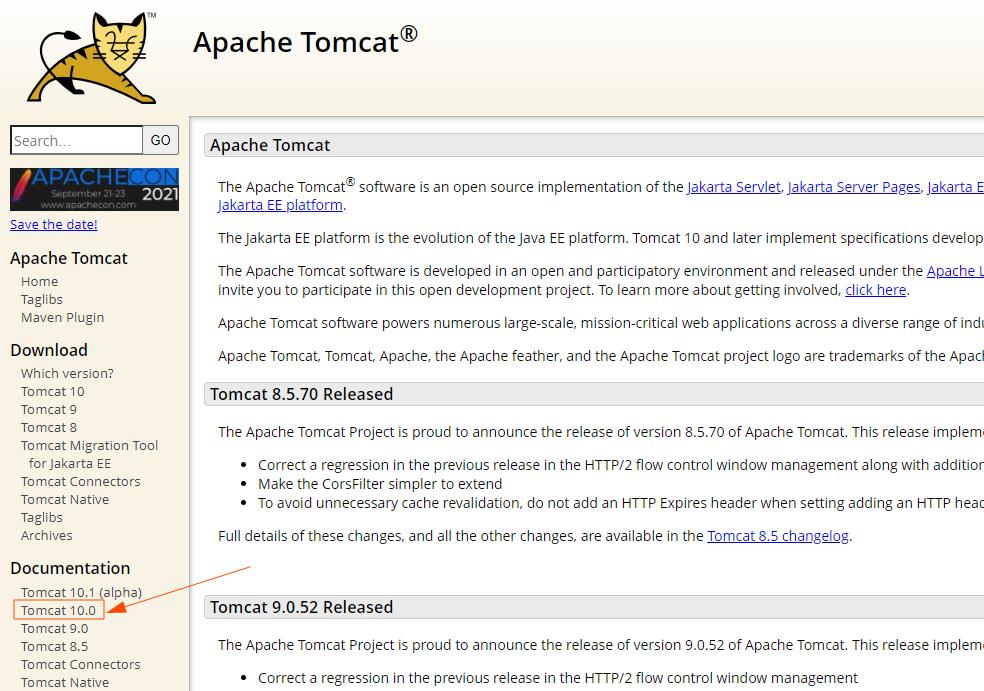
Navigate the web folio and select the 32-bit/64-bit Windows Service installer package.

Step 2
Once the download is consummate, launch the installer package to begin the installation process.

Pace 3
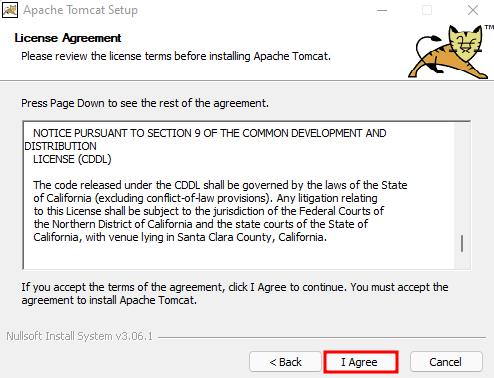
Click Adjacent to proceed with the installer instruction. Read and Agree to the License.
Step 4
In the installation components windows, select the dropdown menu and select full. This will install the Tomcat server, offset card items, examples, admin interface, and the documentation tools.
If you practice not demand all of these components, unselect them.

Footstep 5
In the next window, we need to gear up up the configuration settings for the Tomcat server.
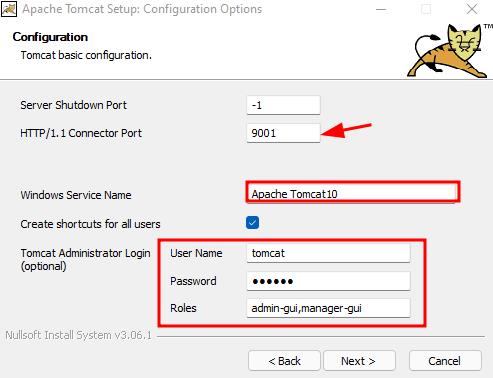
Set the port on which you lot want Tomcat to run. In this example, we prepare the port as 9001. Feel complimentary to customize this to any port you see fit.
Adjacent, enter the proper name for the Tomcat service. You can get out the default.
Finally, fix the Tomcat assistants credentials such every bit username and password.
Step 6
In the next step, select the path to the Java Virtual Machine. Since we have the JDK path in the environs variables, this should be motorcar fill automatically.

In the next step, choose the install location and click install.
Pace vii
Once the installation completes, uncheck "Prove Readme" and click Finish to launch the Apache Tomcat immediately afterward the installation.

Verify Service is Working
To ensure the Apache Tomcat service is running, run the Windows cmd as an administrator.
Enter the command as:
The command should list the started services. Ensure Tomcat is in the list as:

If the service is not running, beginning it using the command:
net start Apache_Tomcat10
Supplant the "Apache_Tomcat10" with the name of the service you created during the installation process.
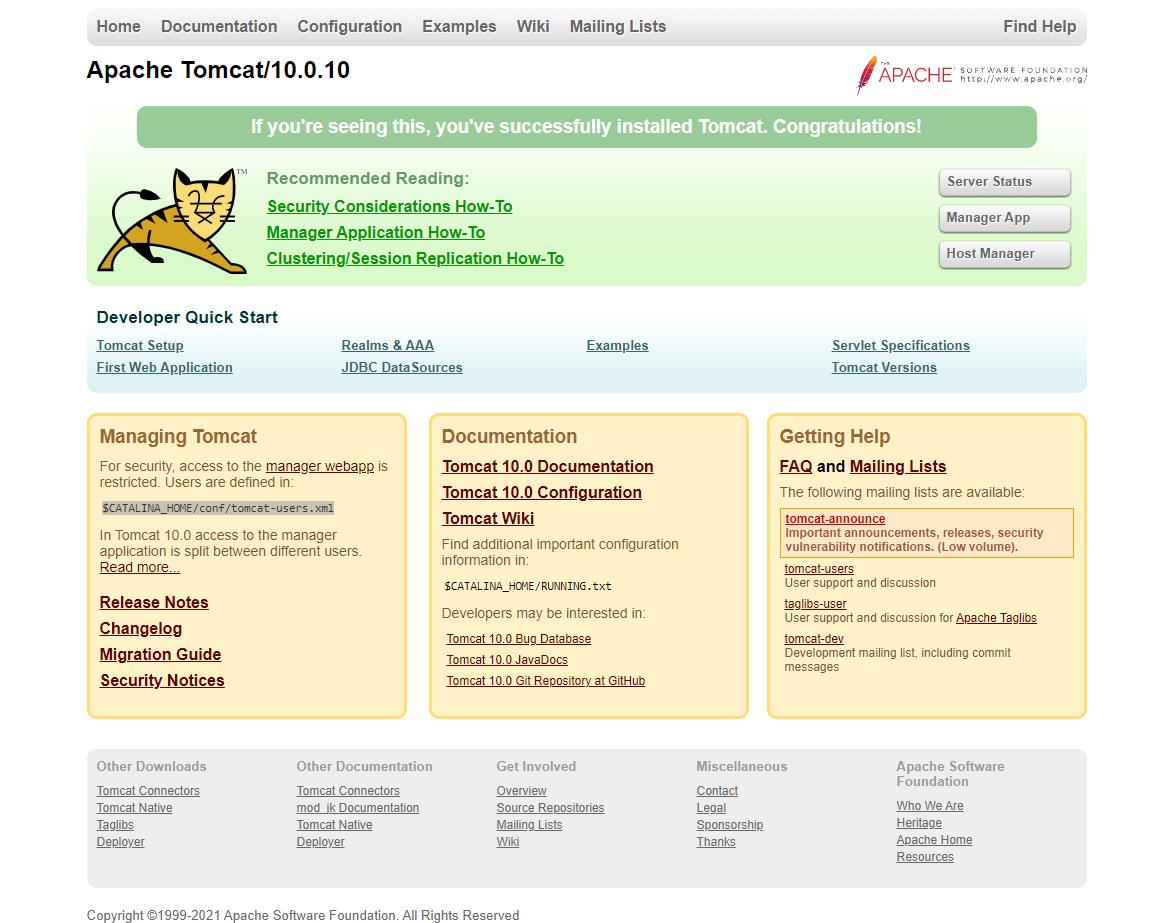
Once the service is up and running, launch the browser and navigate to the Tomcat service.
http://127.0.0.1:9001
This should brandish the Apache Tomcat default page.
Conclusion
This tutorial taught you how to install and set up Java Evolution Kit and Apache Tomcat webserver. To larn more about working with Apache Tomcat, check out our other tutorials on the topic.
Thanks for reading
Near the author
![]()
My name is John and am a beau geek like you. I am passionate most all things computers from Hardware, Operating systems to Programming. My dream is to share my cognition with the world and help out young man geeks. Follow my content by subscribing to LinuxHint mailing list
Source: https://linuxhint.com/install-apache-tomcat-windows/
Posted by: lindseysamot1957.blogspot.com
0 Response to "How To Install Apache Tomcat On Windows 8 64 Bit"
Post a Comment